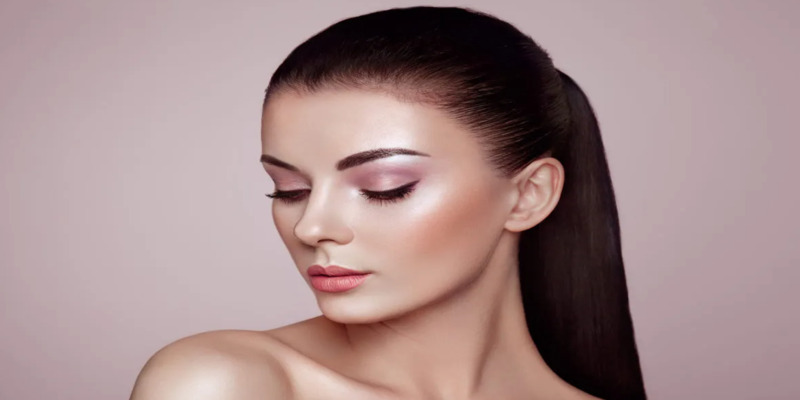
In the realm of makeup, highlighters have established a vital presence, helping to transform mundane beauty routines into radiant displays of luminosity. Once regarded as solely a product for special occasions, achieving a glowing complexion has gained widespread popularity among beauty aficionados and professionals. This increasing demand for a lit-from-within effect not only enhances natural features but also adds an invigorating vibrancy to the face. Whether opting for a subtle sheen suitable for a workday or a bold shimmer for an evening out, highlighters have become integral components that elevate any makeup approach.
Pursuing that iconic glow permeates beauty communities, so knowing how to apply highlighter effectively is essential for mastering this craft. This article is your all-encompassing guide, providing techniques and tips for achieving the perfect luminous finish. From product selection to application methods tailored specifically for your unique features, we're here to assist you in ensuring that each swipe of highlighter enhances the radiance you aim to showcase. Prepare to enliven your beauty journey!
Understanding Highlighter
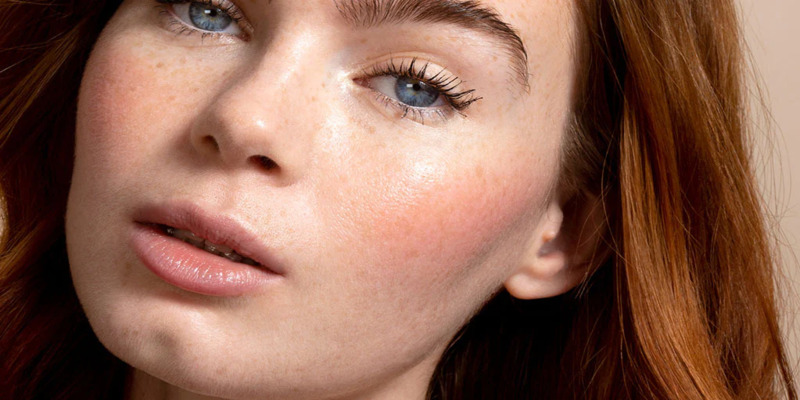
In makeup terminology, a highlighter is a cosmetic designed to accentuate certain facial features, lending a luminous shine that captivates light and enhances one's natural beauty. Its primary objective is to reflect light, define the face and create a youthful, radiant appearance, which makes it a staple in numerous makeup regimens.
Highlighters exist in various formulations, mainly classified into three categories: powder, cream, and liquid. Powder highlighters are the most favoured option, delivering a lightweight finish that is easy to apply and blend for a subtle glow that is ideal for daily wear. By contrast, cream highlighters provide a more intense shine and can be layered for a customized effect. They are versatile, enabling application with either fingers or brushes, catering to those pursuing a dewy aesthetic. Liquid highlighters, typically packaged in dropper bottles, allow precision in the application, enabling blending with foundation or direct application to the skin for a strobing effect, making them perfect for more glamorous occasions.
The advantages of employing highlighters are considerable. They illuminate the elevated areas of the face, such as the cheekbones, brow bones, and nose bridge. By boosting these key features, highlighters create depth and dimension, rejuvenating the complexion and offering an appearance of healthier, more hydrated skin. With the correct type of highlighter paired with suitable application techniques, anyone can achieve a radiant look that enhances their beauty effortlessly.
Essential Tools For Application
Utilizing the right tools is paramount to attaining a flawless highlighter application. Here's a concise list of essential items that can significantly boost your highlighting capabilities!
1. Brushes: The variety of brushes can significantly influence the finish of your highlighter. A fan brush provides a light, diffused application, perfect for adding a gentle sheen to the cheekbones. For a precise application, a tapered brush is optimal; its pointed tip grants control over product placement, making it ideal for highlighting cheekbones and brow bones specifically.
2. Sponges: A beauty blender or makeup sponge ensures a seamless finish, especially when working with cream highlighters. Damping the sponge before usage enhances blending, allowing the highlighter to melt seamlessly into your skin, yielding an undetectable glow.
3. Fingers: The power of your fingertips should not be underestimated! They are excellent for warming up cream highlighters, allowing the product to disperse evenly for a natural look that blends effortlessly.
Utilizing the right tools is crucial as it directly impacts the quality of your makeup application. Each tool contributes uniquely, facilitating the achievement of that sought-after, radiant glow with ease.
Step-By-Step Guide To Applying Highlighter
Highlighter is a transformative product that can accentuate your features, providing your skin with a radiant, sun-kissed appearance. However, reaching that perfect luminous finish necessitates practice and precise techniques. Here’s a detailed step-by-step guide for applying highlighter that will leave you beaming with confidence.
Step 1: Prep Your Skin
Prepping your skin is vital for achieving flawless highlighter application. Begin with a clean and moisturized face to establish a smooth base. Consider using a hydrating primer, which can add moisture to your skin while prolonging the wear of your makeup. Products like Tatcha The Silk Canvas or Smashbox Photo Finish Primer can provide a seamless canvas. If dullness is an issue, incorporate a brightening serum or essence, such as Ole Henriksen Banana Bright Vitamin C Serum, before applying your primer. This skincare lineup not only boosts your glow but also enhances the adherence to the highlighter, ensuring that it lasts longer throughout the day.
Step 2: Choose The Right Shade
Selecting the ideal highlighter shade can significantly enhance your glow. For fair skin tones, look for shades like icy pearl or delicate pink that brighten your complexion beautifully. Those with medium skin tones can choose champagne or golden tones that complement the warmth in their skin. For individuals with deeper skin tones, a rich gold or bronze highlighter will stand out stunningly against their complexion. It’s vital to swatch highlighters in natural lighting to assess how they reflect light and match your skin tone accurately. This method ensures you select a shade that uplifts your features instead of washing them out, providing the perfect glow.
Step 3: Application Techniques
After preparing your skin and selecting your highlighter shade, you can apply it using techniques customized to your chosen product type.
Powder Highlighter
For powder highlighter, use either a fan brush or tapered brush. Gently dip the brush into the product, tapping off any excess. Focus on the high points of your face, primarily the tops of your cheekbones, brow bone, and nose bridge. Gradually build the glow by applying layers and blending well after each layer to avoid stark lines.
Cream Highlighter
Your fingertips or a damp makeup sponge are your best bet when working with cream highlighters. Start by dabbing a small quantity onto the back of your hand. Then, use your fingertips to warm the product up, creating a more effortless glide. Apply the cream to the same high points as the powder, gently blending outward using your fingers or sponge to ensure a seamless finish.
Liquid Highlighter
With liquid highlighters, utilize just a drop or two, as they have high pigmentation. Apply a small amount directly onto your cheekbones and blend quickly using your fingertips or a damp sponge. For an ethereal glow, mix a touch of highlighter with your foundation for an all-over luminosity. Avoid streaks by working in small sections, blending rapidly as the product dries.
Blending Tips
Regardless of the highlighter formula used, mastering the art of blending is essential to achieve the natural, lit-from-within finish coveted by many. Employ a gentle touch, building the product slowly, ensuring each layer is well-blended for a flawless look.
Step 4: Finishing Touches
To ensure your highlighter endures throughout the day, conclude your look with a setting spray or powder. A setting spray, such as Urban Decay All Nighter, can effectively lock in your makeup while enhancing the luminosity of the highlighter without dulling its shine. Alternatively, if you prefer a powder finish, lightly apply a translucent powder to areas where highlighter wasn't used, preserving your glow while minimizing excess shine. Avoiding dusting powder directly over the highlighted areas is crucial to maintaining that radiant finish. This final touch solidifies that you remain glowing all day, irrespective of the occasion.
These steps make applying highlighter a seamless addition to your routine, resulting in a flawless, illuminating glow. Begin perfecting your highlight application today!
Common Mistakes To Avoid
Engaging in highlighter applications, even experienced makeup lovers can fall prey to common missteps that diminish the sought-after glow. Here's a quick rundown of mistakes you should be vigilant about:
1. Using Too Much Product: Overloading on highlighter can easily yield a greasy or overly shiny appearance. Correction Tip: Start with a minimal amount; adding more as needed is possible. Dabbing the product onto your skin with your fingertips or a damp sponge aids in controlling the application.
2. Incorrect Placement: Improperly applying highlighter can warp your facial features instead of enhancing them. Correction Tip: Target the high points of your face—cheekbones, brow bones, and the bridge of your nose. Consider your face shape when determining the optimal placement.
3. Neglecting to Blend: Harsh lines can render highlighter applications unappealing. Correction Tip: Blend, blend, blend! Use a clean brush or sponge to ensure the highlighter diffuses seamlessly into your skin for a soft, glowing finish.
Being aware of these common pitfalls makes achieving your perfect radiant glow much simpler!
Unleashing Your Inner Glow
In this article, we have delved into the intricacies of applying highlighter for a radiant result, covering application techniques, necessary tools, and common pitfalls to navigate. Remember, achieving that impeccable shine resides in practice and discovery. Embrace the journey of experimenting with different application techniques until you uncover what enhances your features.


